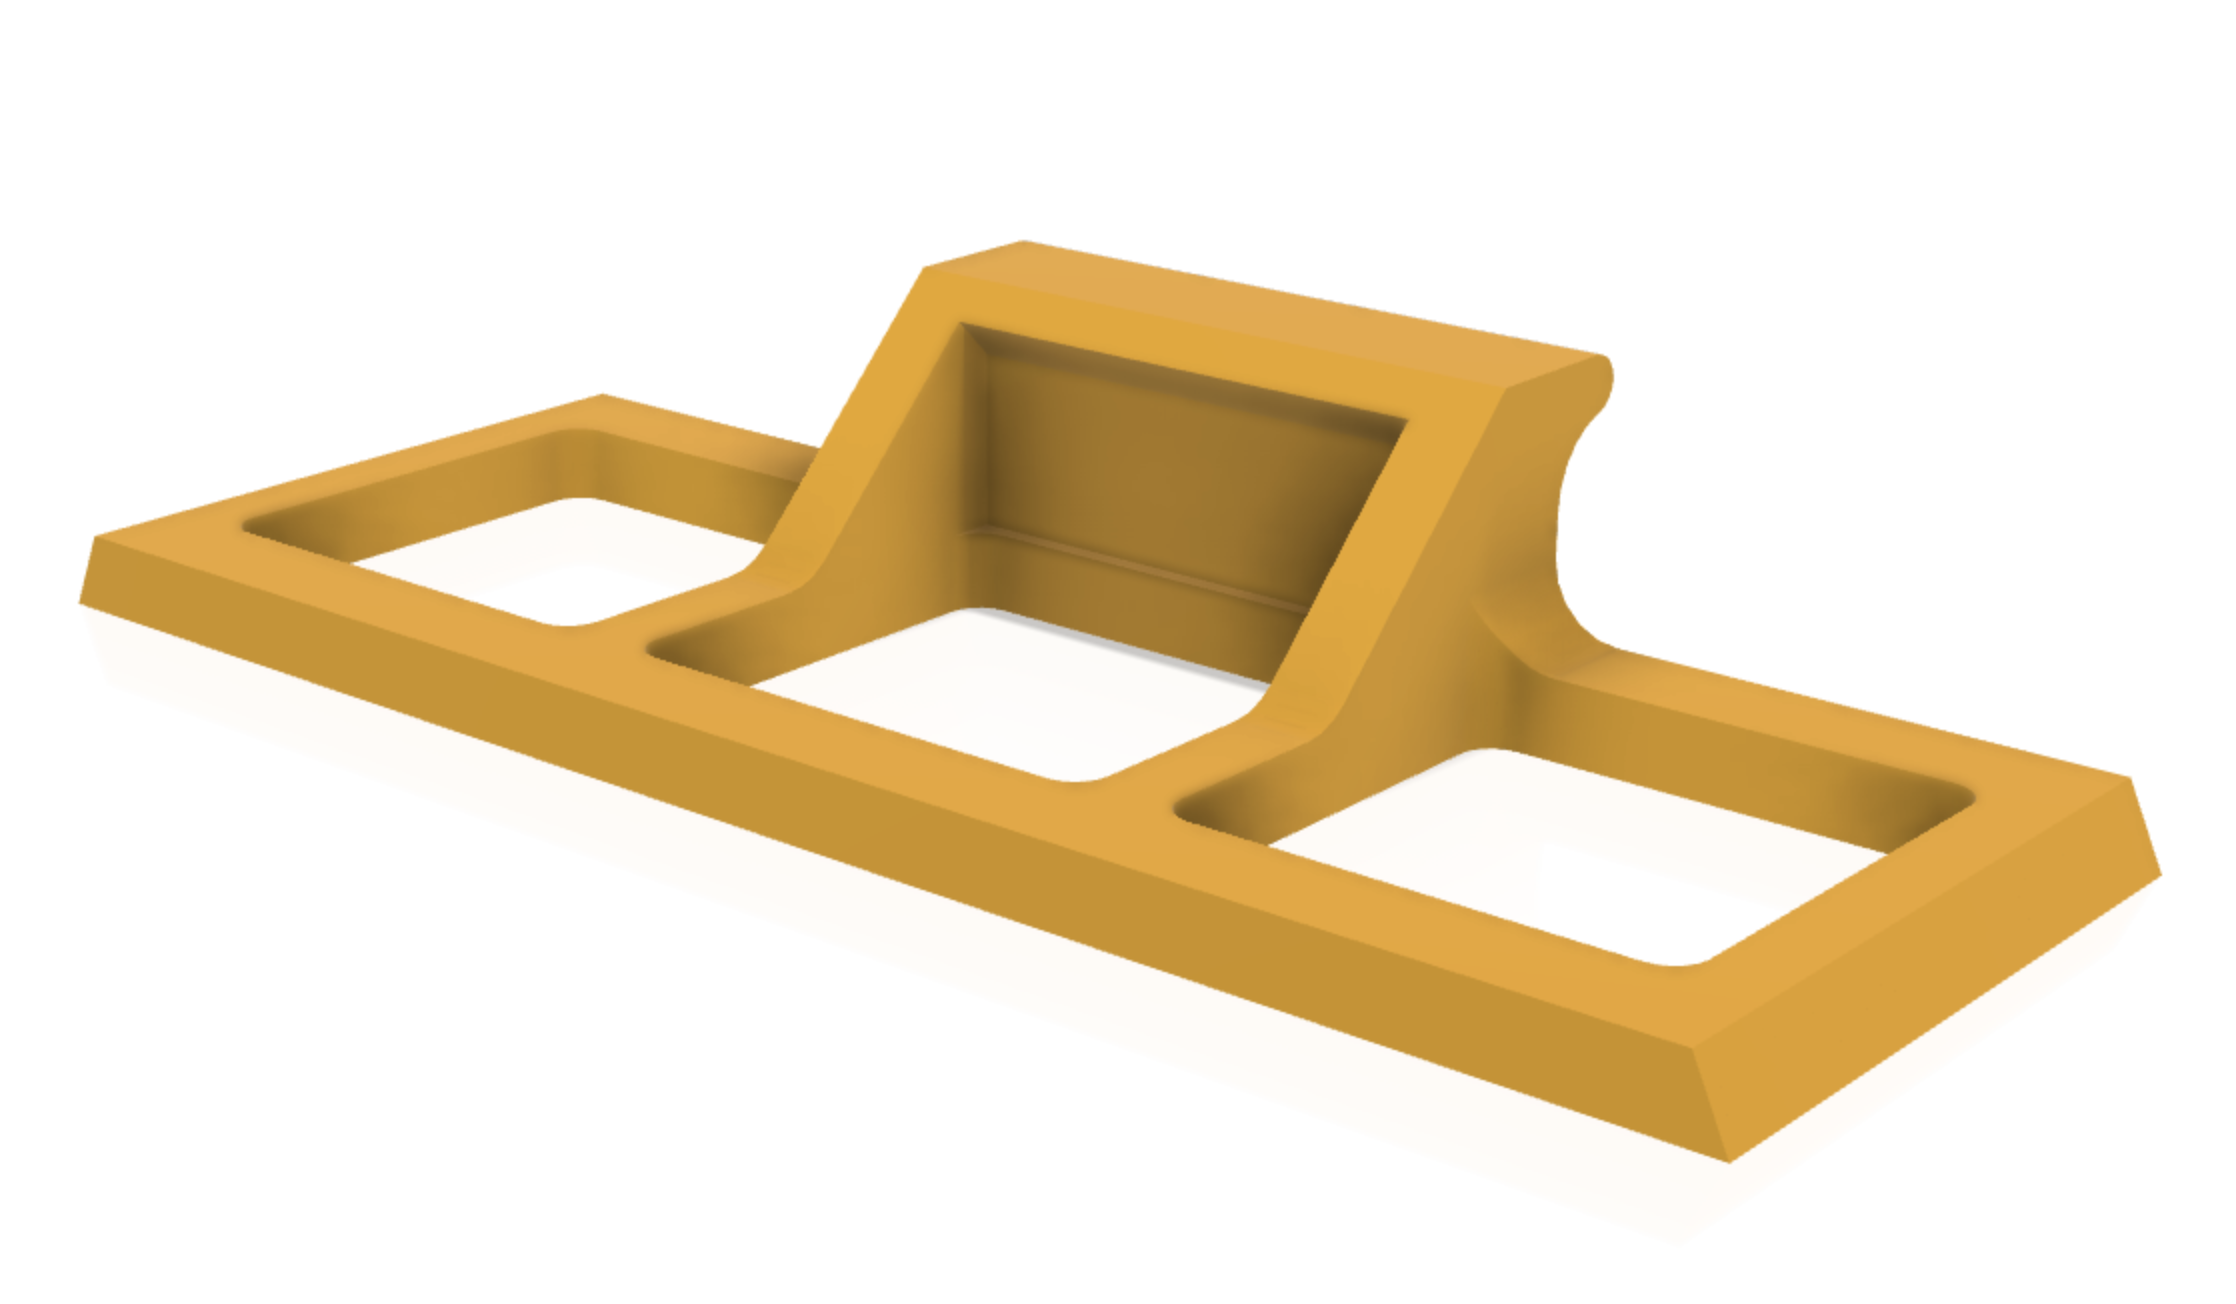
Motor holder Design
SMARS Motor holder design
Watch the step by step guide of how to create the Motor holders using Fusion 360.
Profiles
The motor holder has three main profiles:
A PDF containing these profiles is available here.
Dimensions Table

| Dimension | Value |
|---|---|
| Height | 19.5mm |
| Thickness | 3mm |
| Side_Cutout | 14mm |
| Roundness | 1mm |
| Gap | 2.2mm |
| Battery_Holder | 2.5mm |
| Length | 53.4mm |
| Depth | 2.2mm |
| Chamfer | 1mm |
| Battery_Holder_Length | 5mm |
| Battery_Holder_Thickness | 1.5mm |
| Battery_Holder_Roundness | 0.85mm |
| Battery_Holder_Front | 1mm |
| Fillets | 2mm |
| Battery tower | 9.3mm |
Base Sketch
The base sketch is pretty straight forward to create - its just a couple of rectangles, with some fillets applied. See the drawing below.

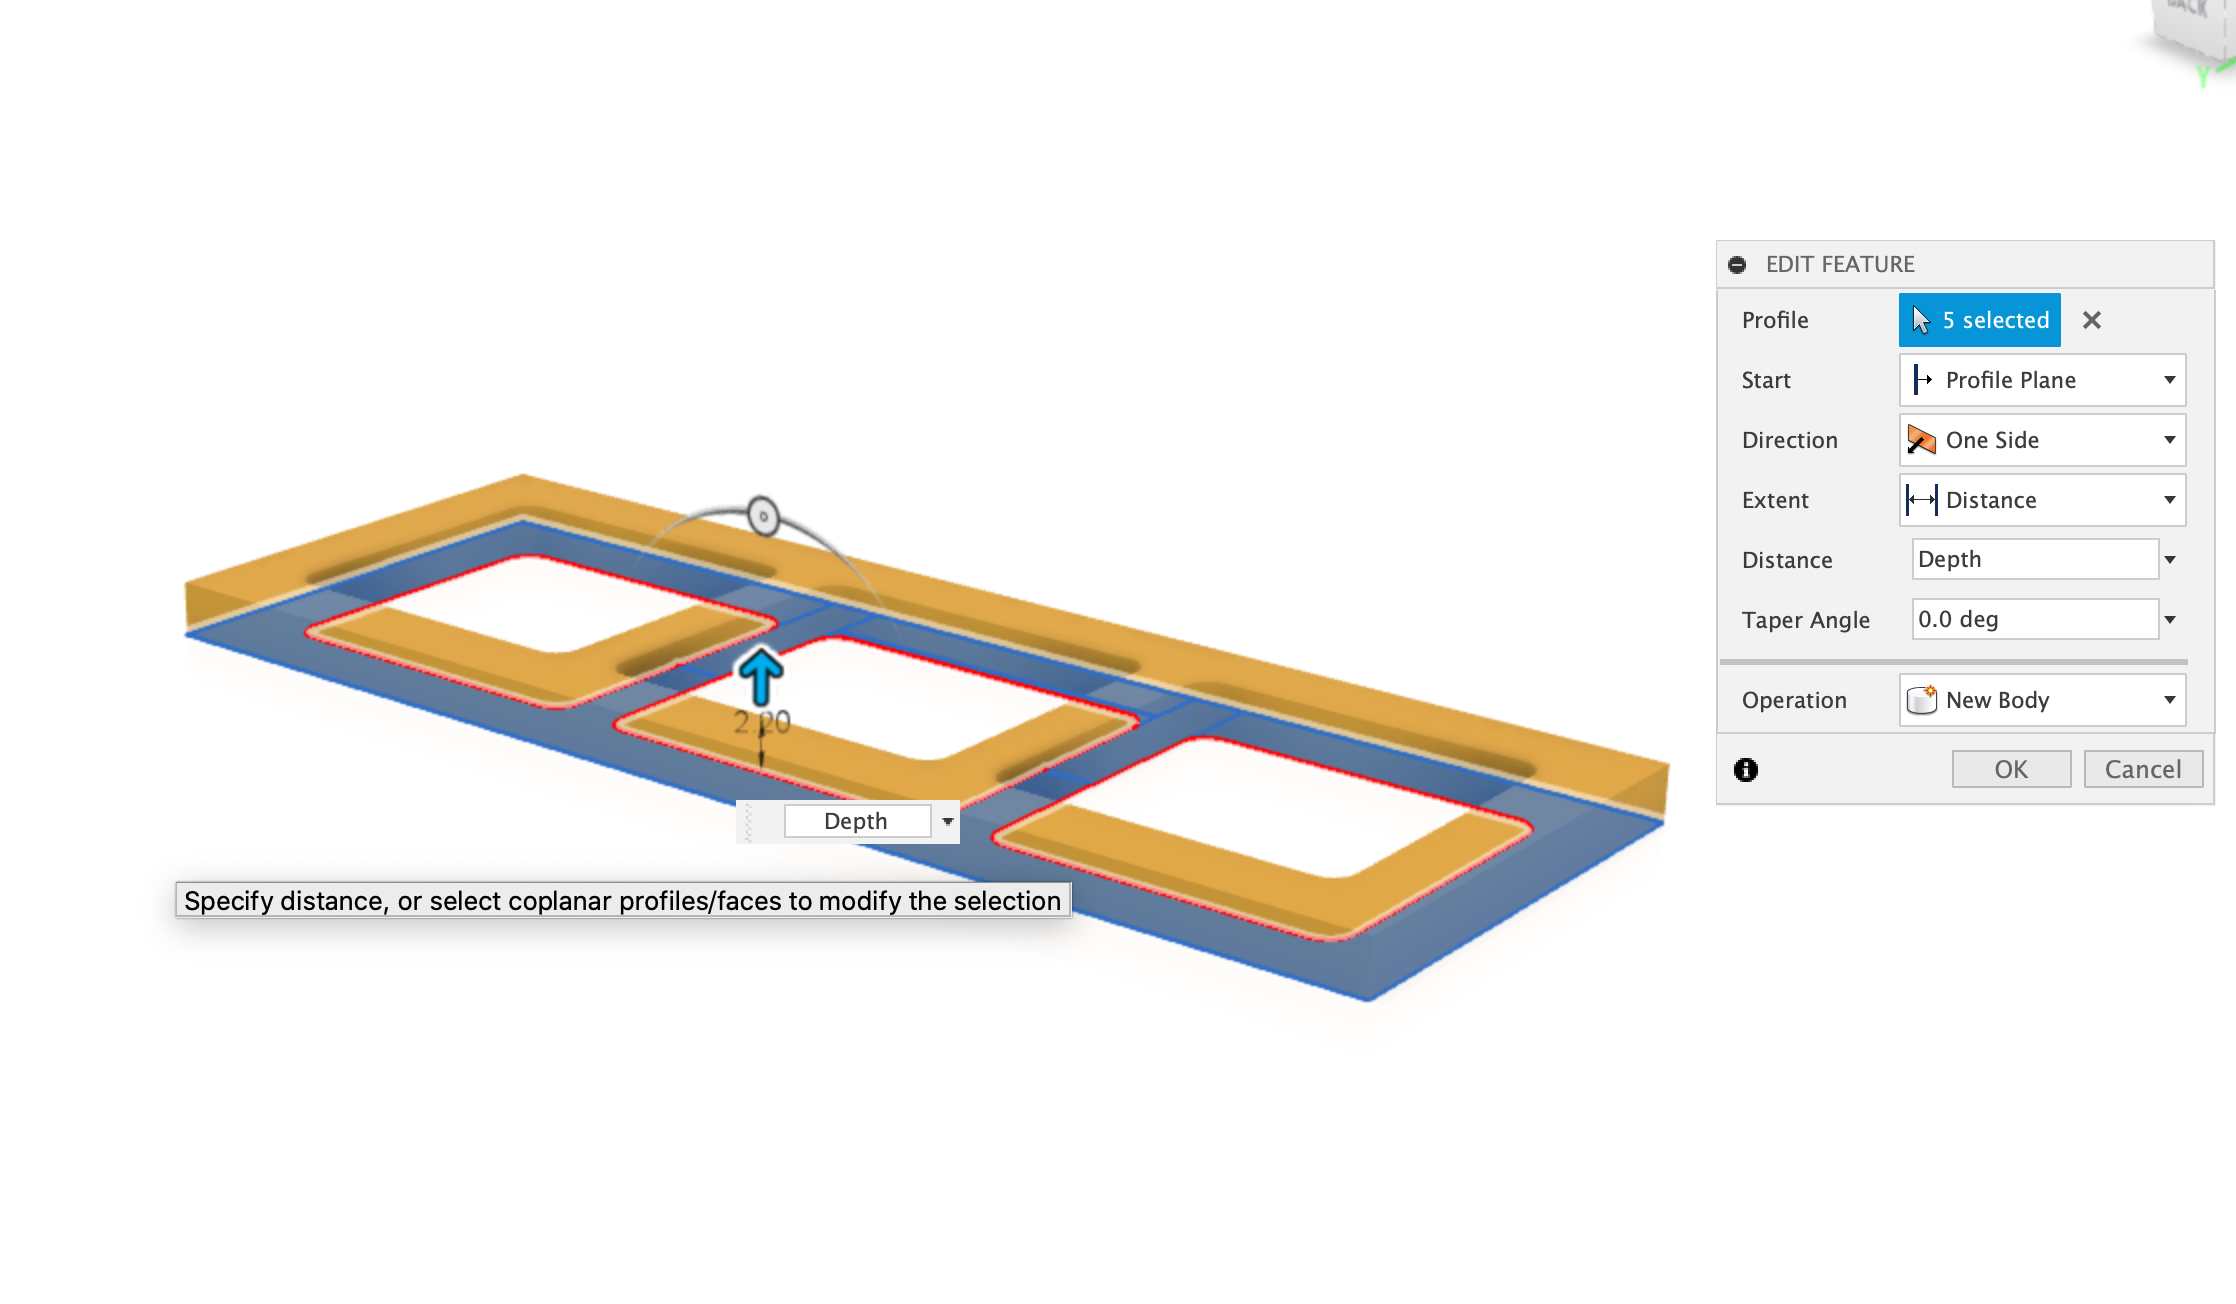
Extrude Base
Extrude the Base Sketch up by 2.2mm
Dimensions:
- Depth = 2.2mm
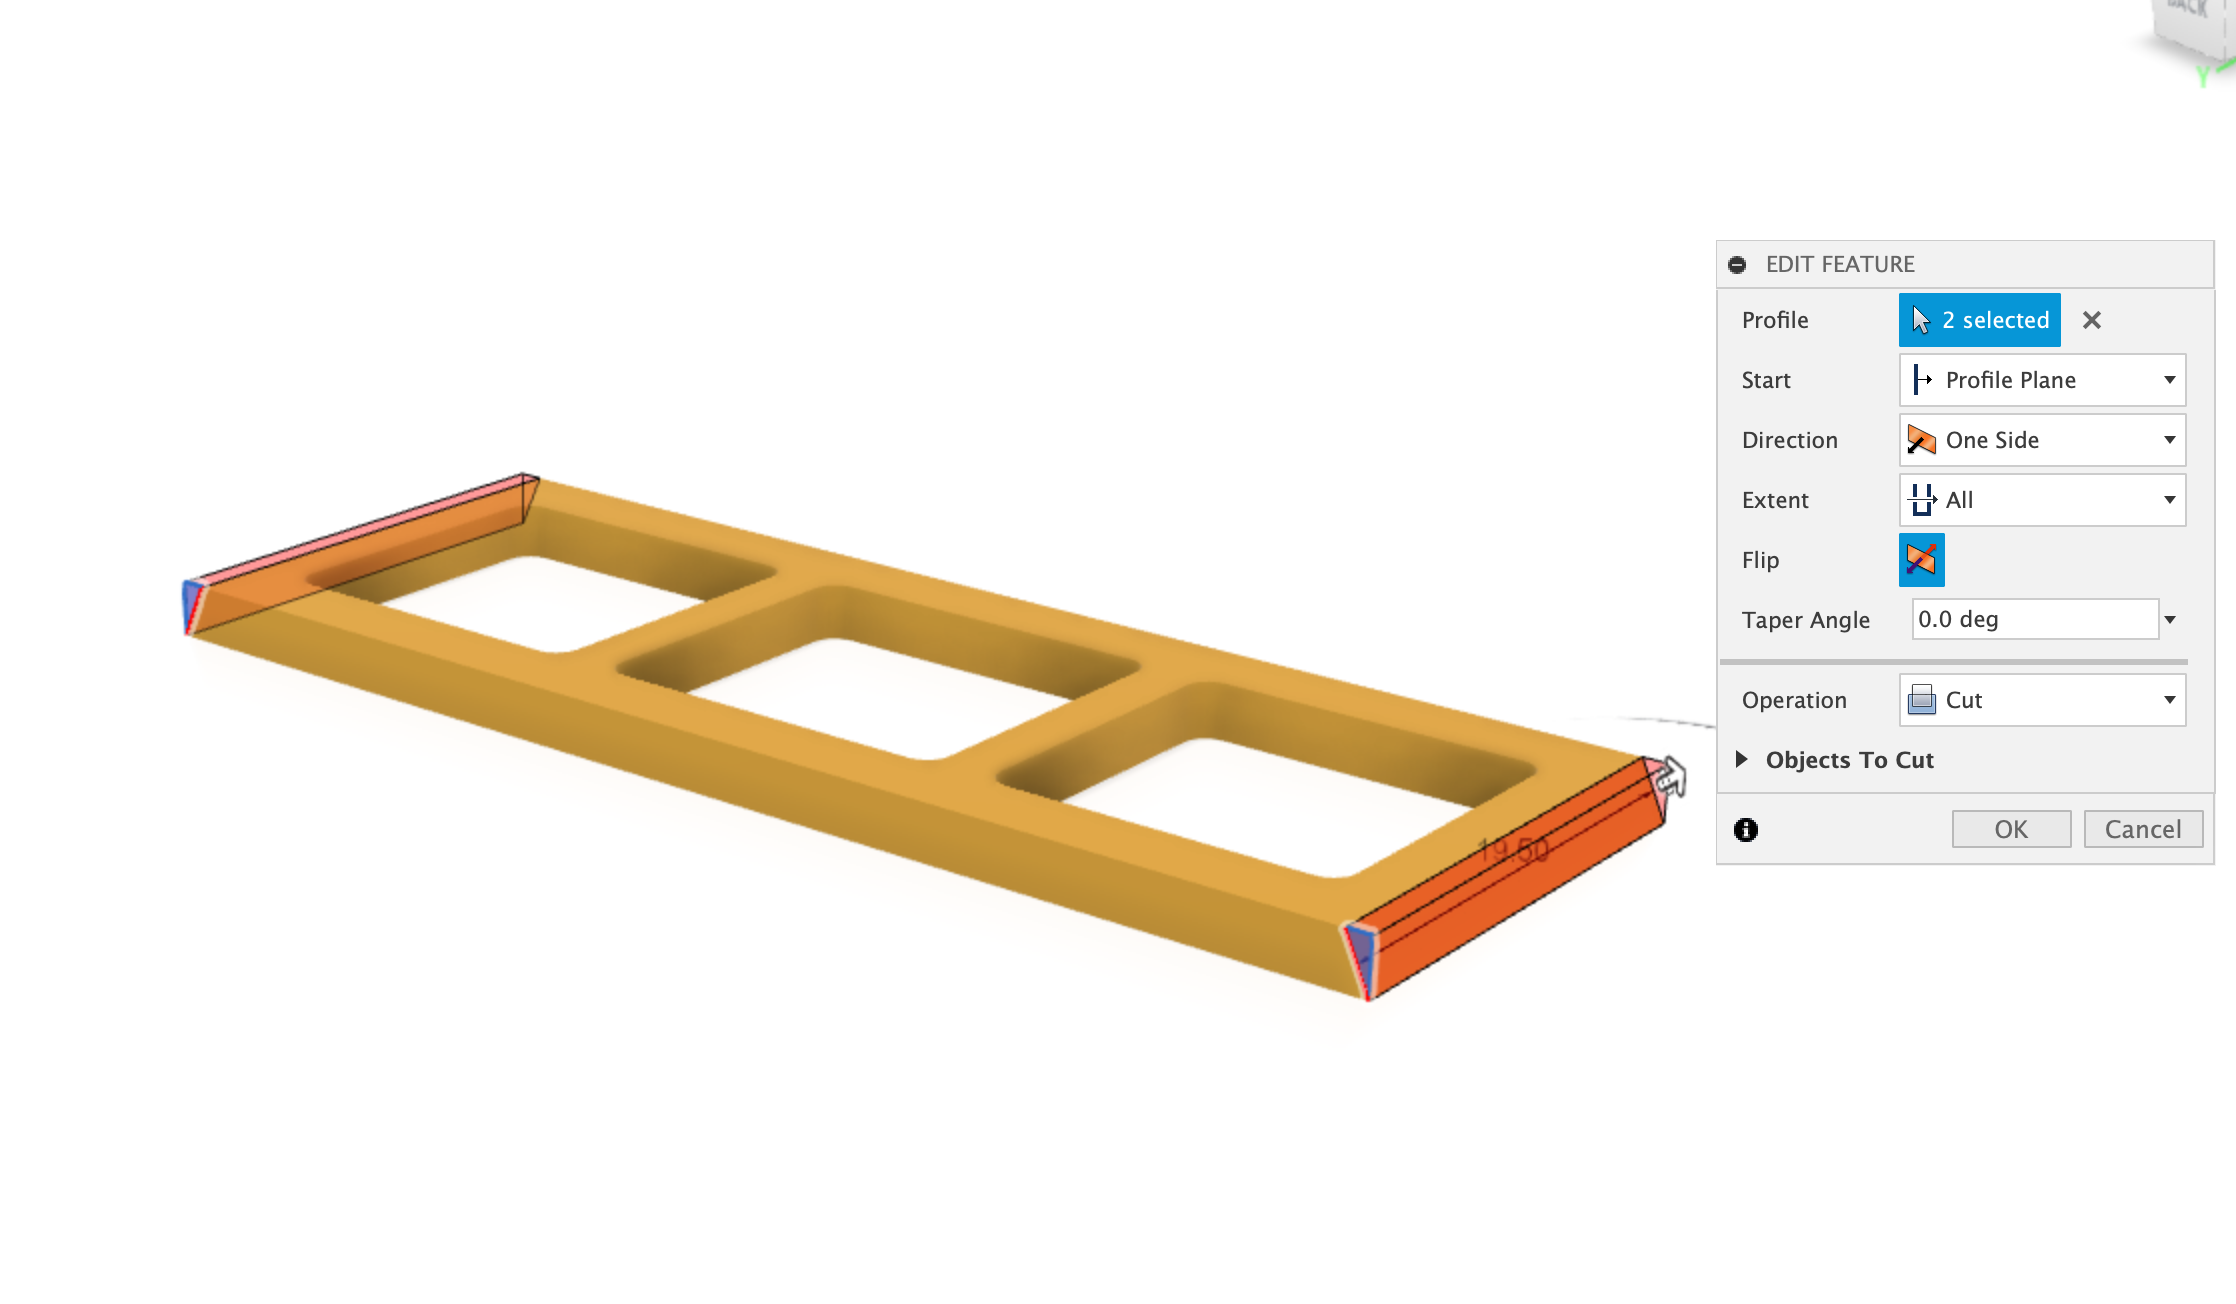
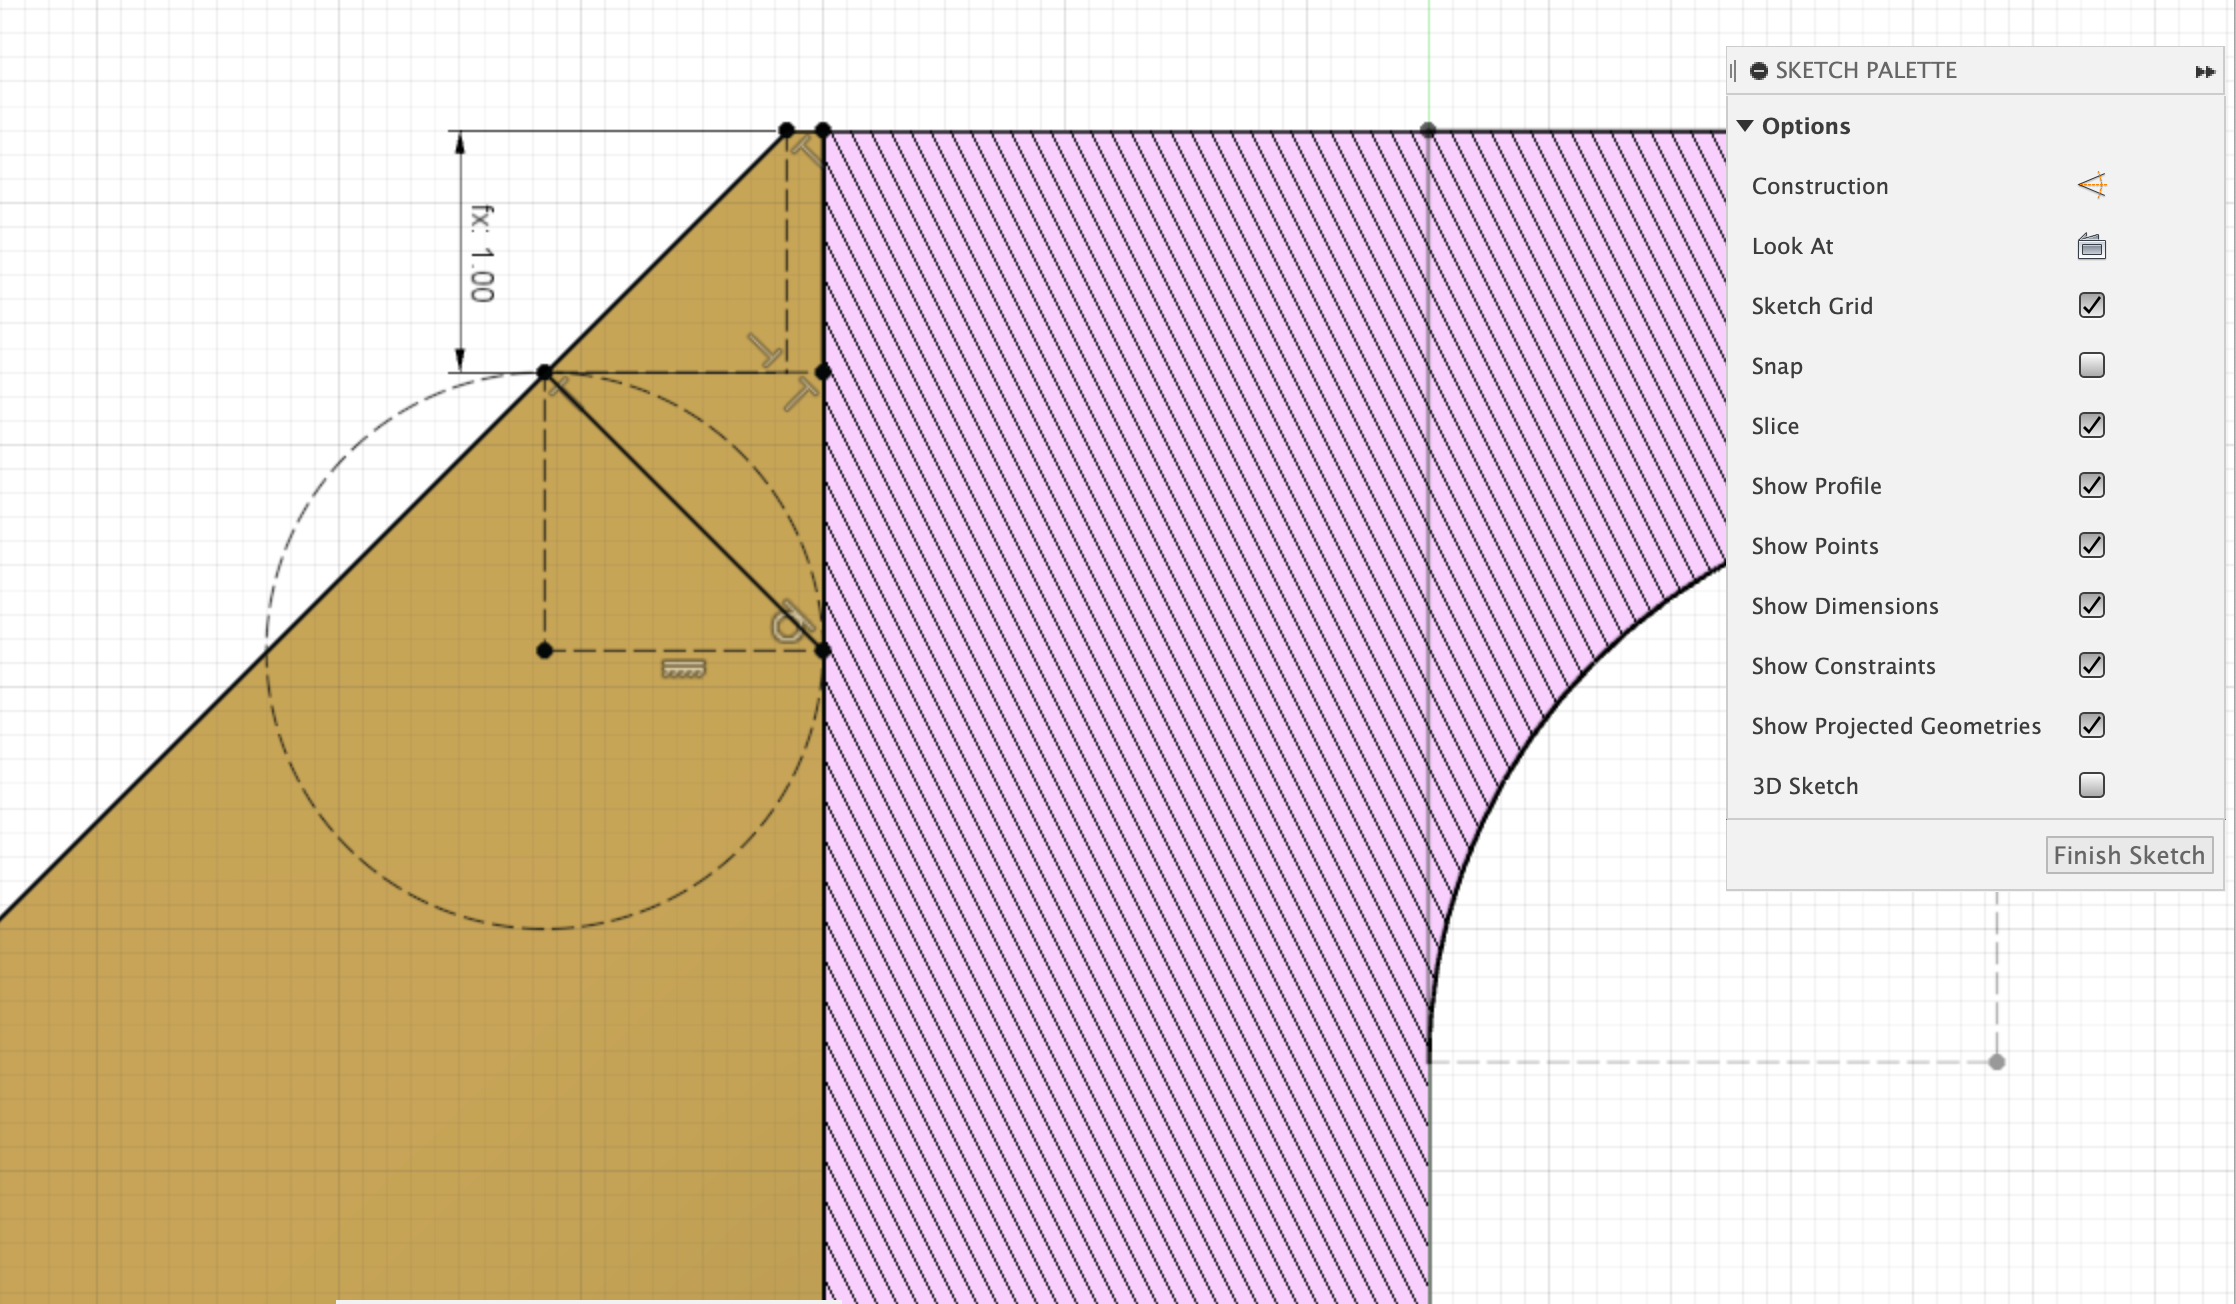
Extrude-Cut Edges
The Edges of the motor holder need to friction fit into the slots in the chassis, so a 1mm angular cut is applied.
Dimensions:
- top of triangle to cut = 1mm
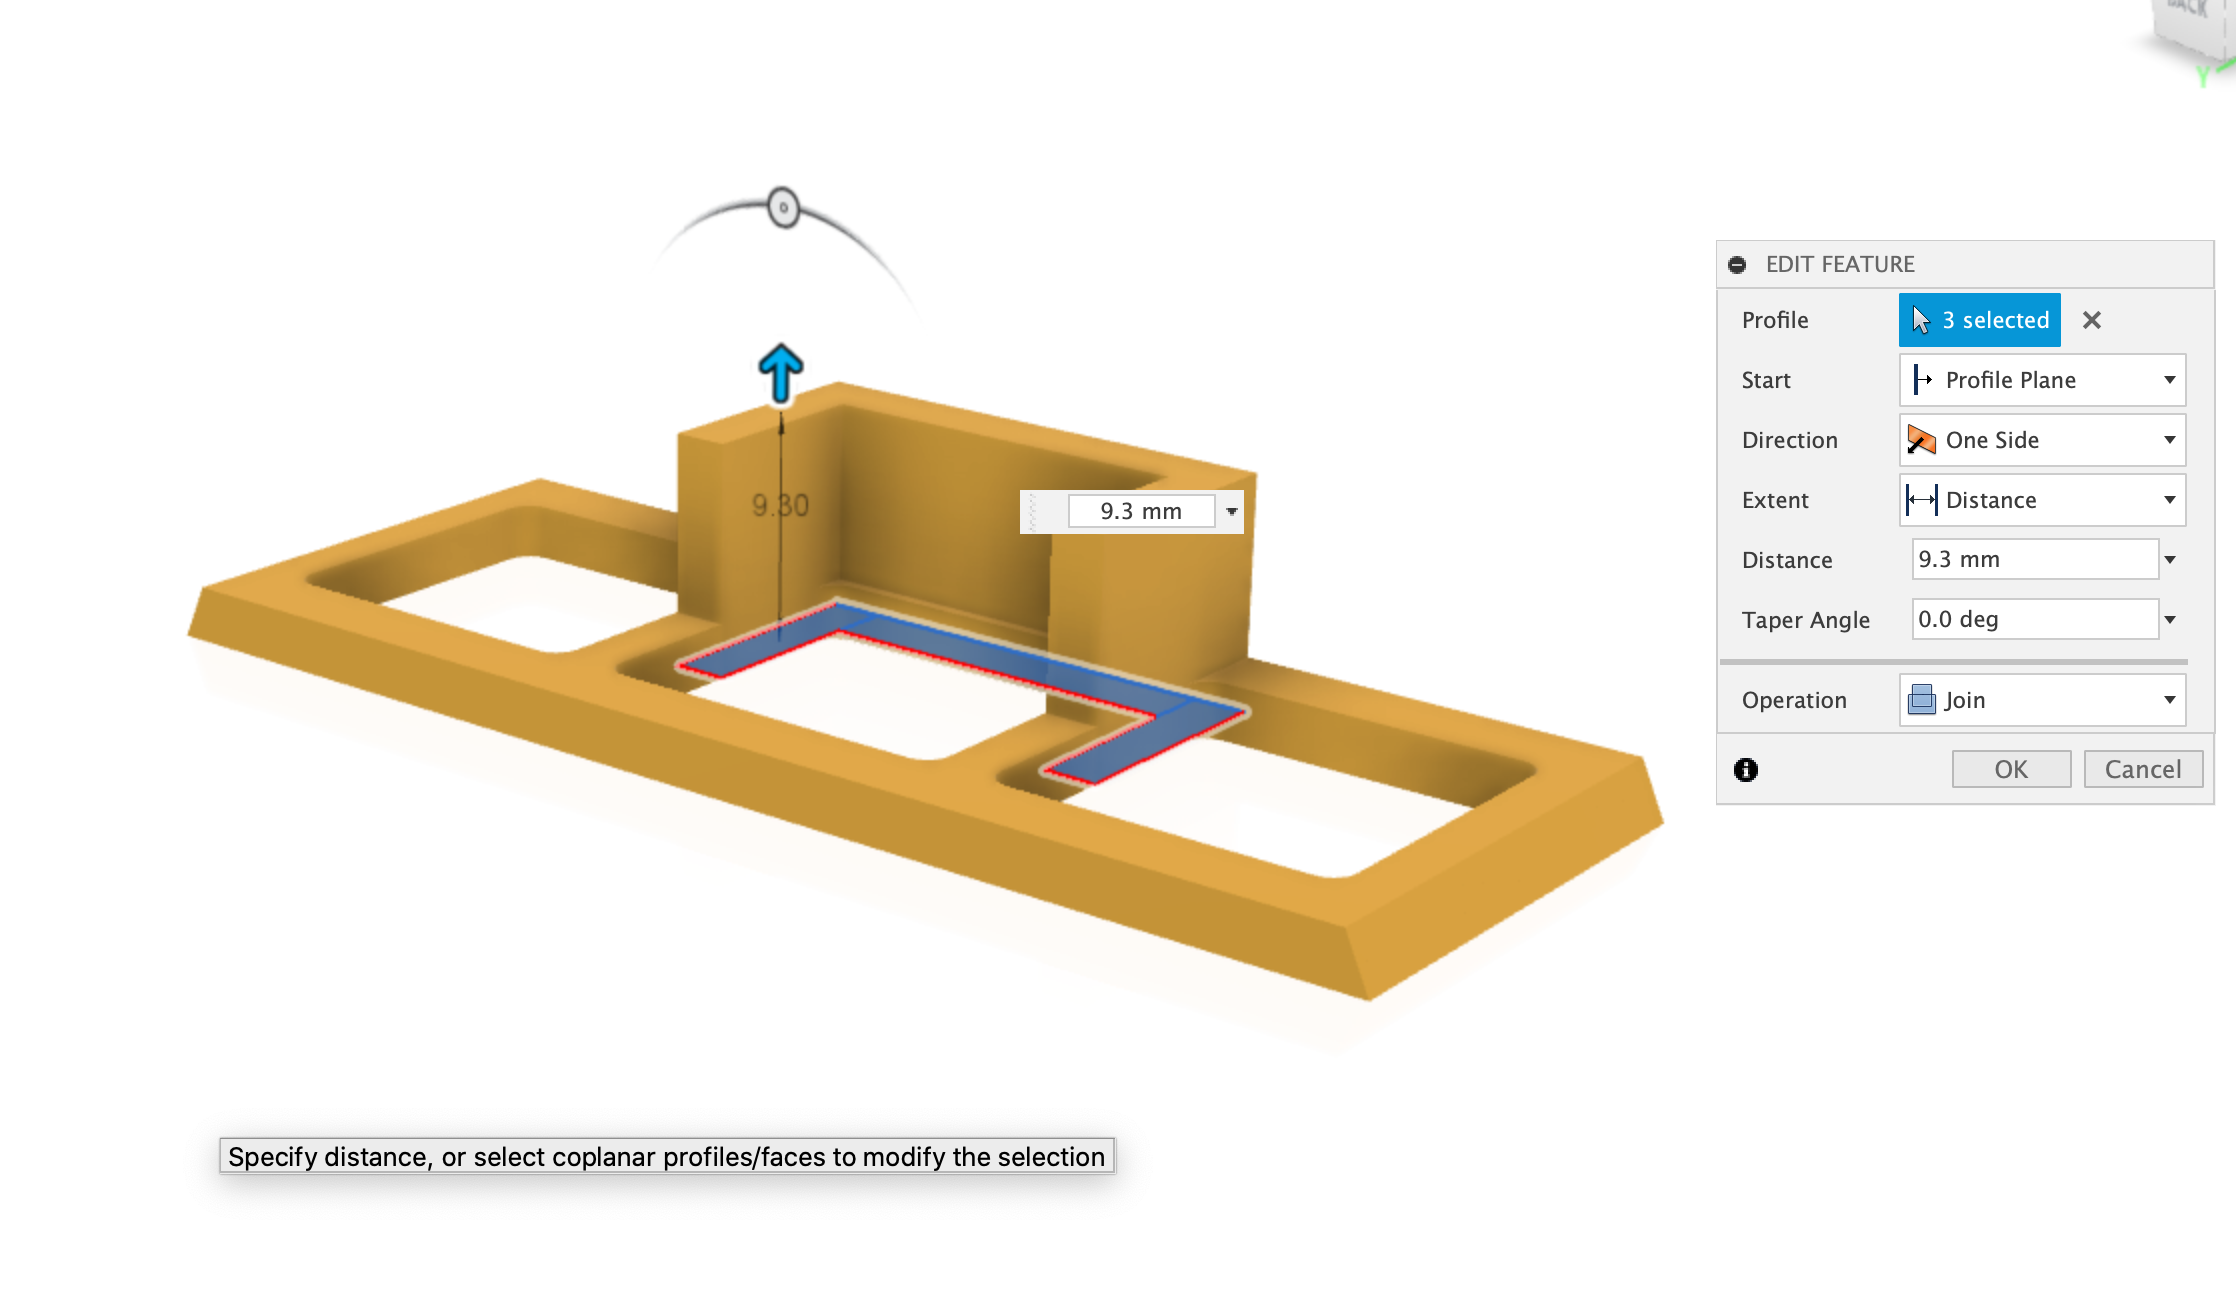
Extrude Battery Holder
Next the base profile is used to select the small raised section that holds the battery in place. See the diagram below to understand which profile parts to slect for extrusion.
Dimensions:
- Depth = 9.3mm
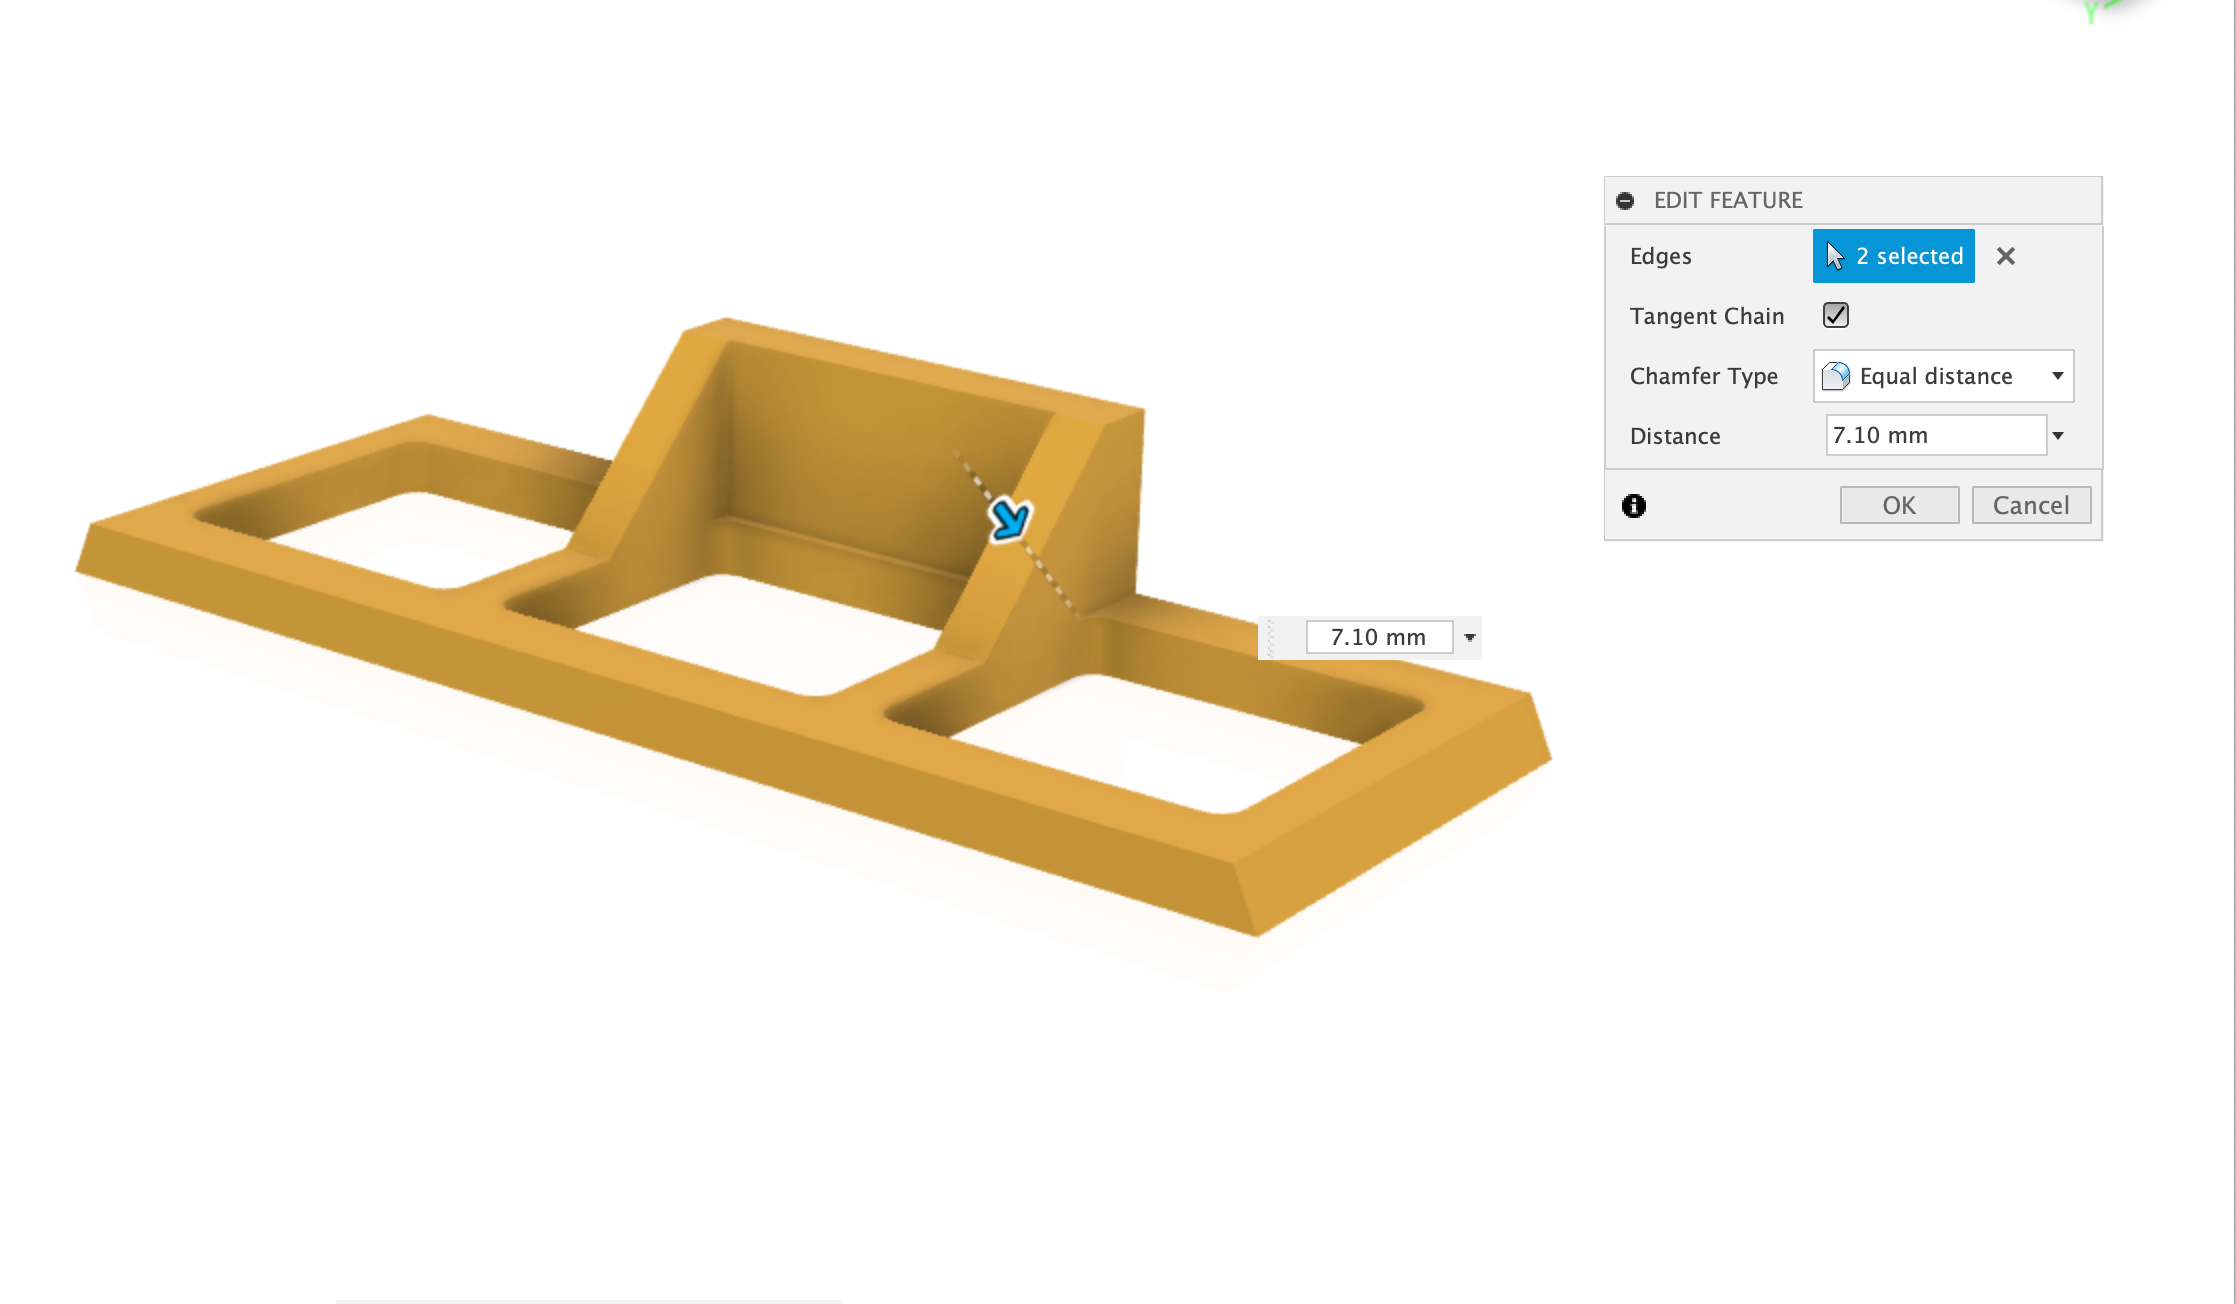
Apply chamfer
The battery tower needs a chamfer applying to it so that it has a 45º degree from the base.
Dimensions:
- Chamfer = 7.1mm
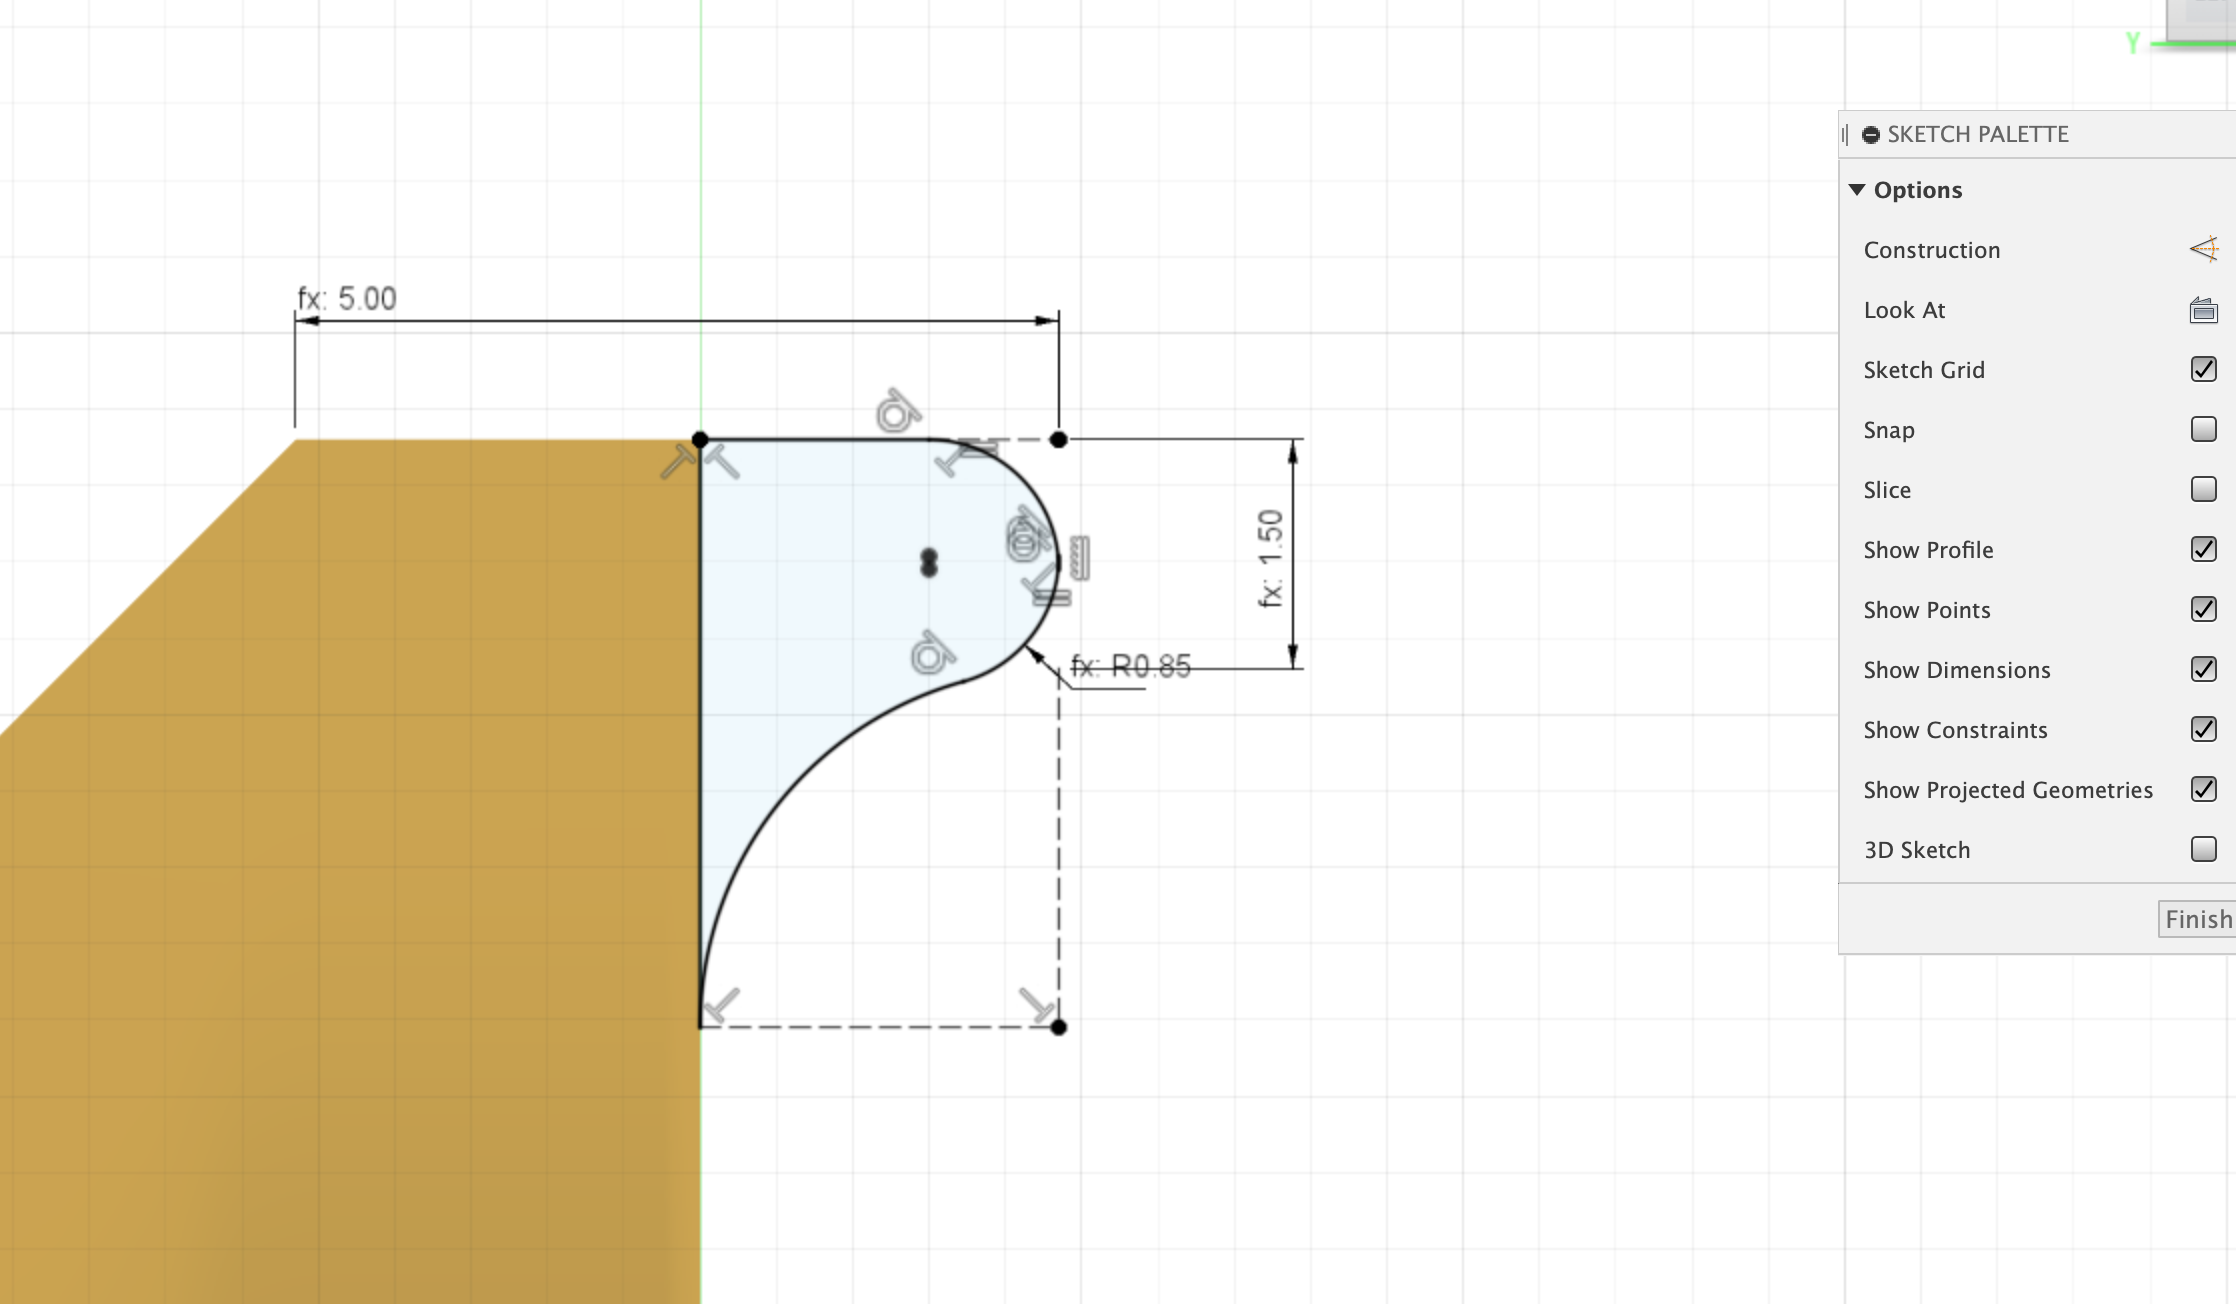
Battery Holder Profile
The Battery folder needs a rounded section to hug the battery and keep it in place. See the illustration below to create the profile.
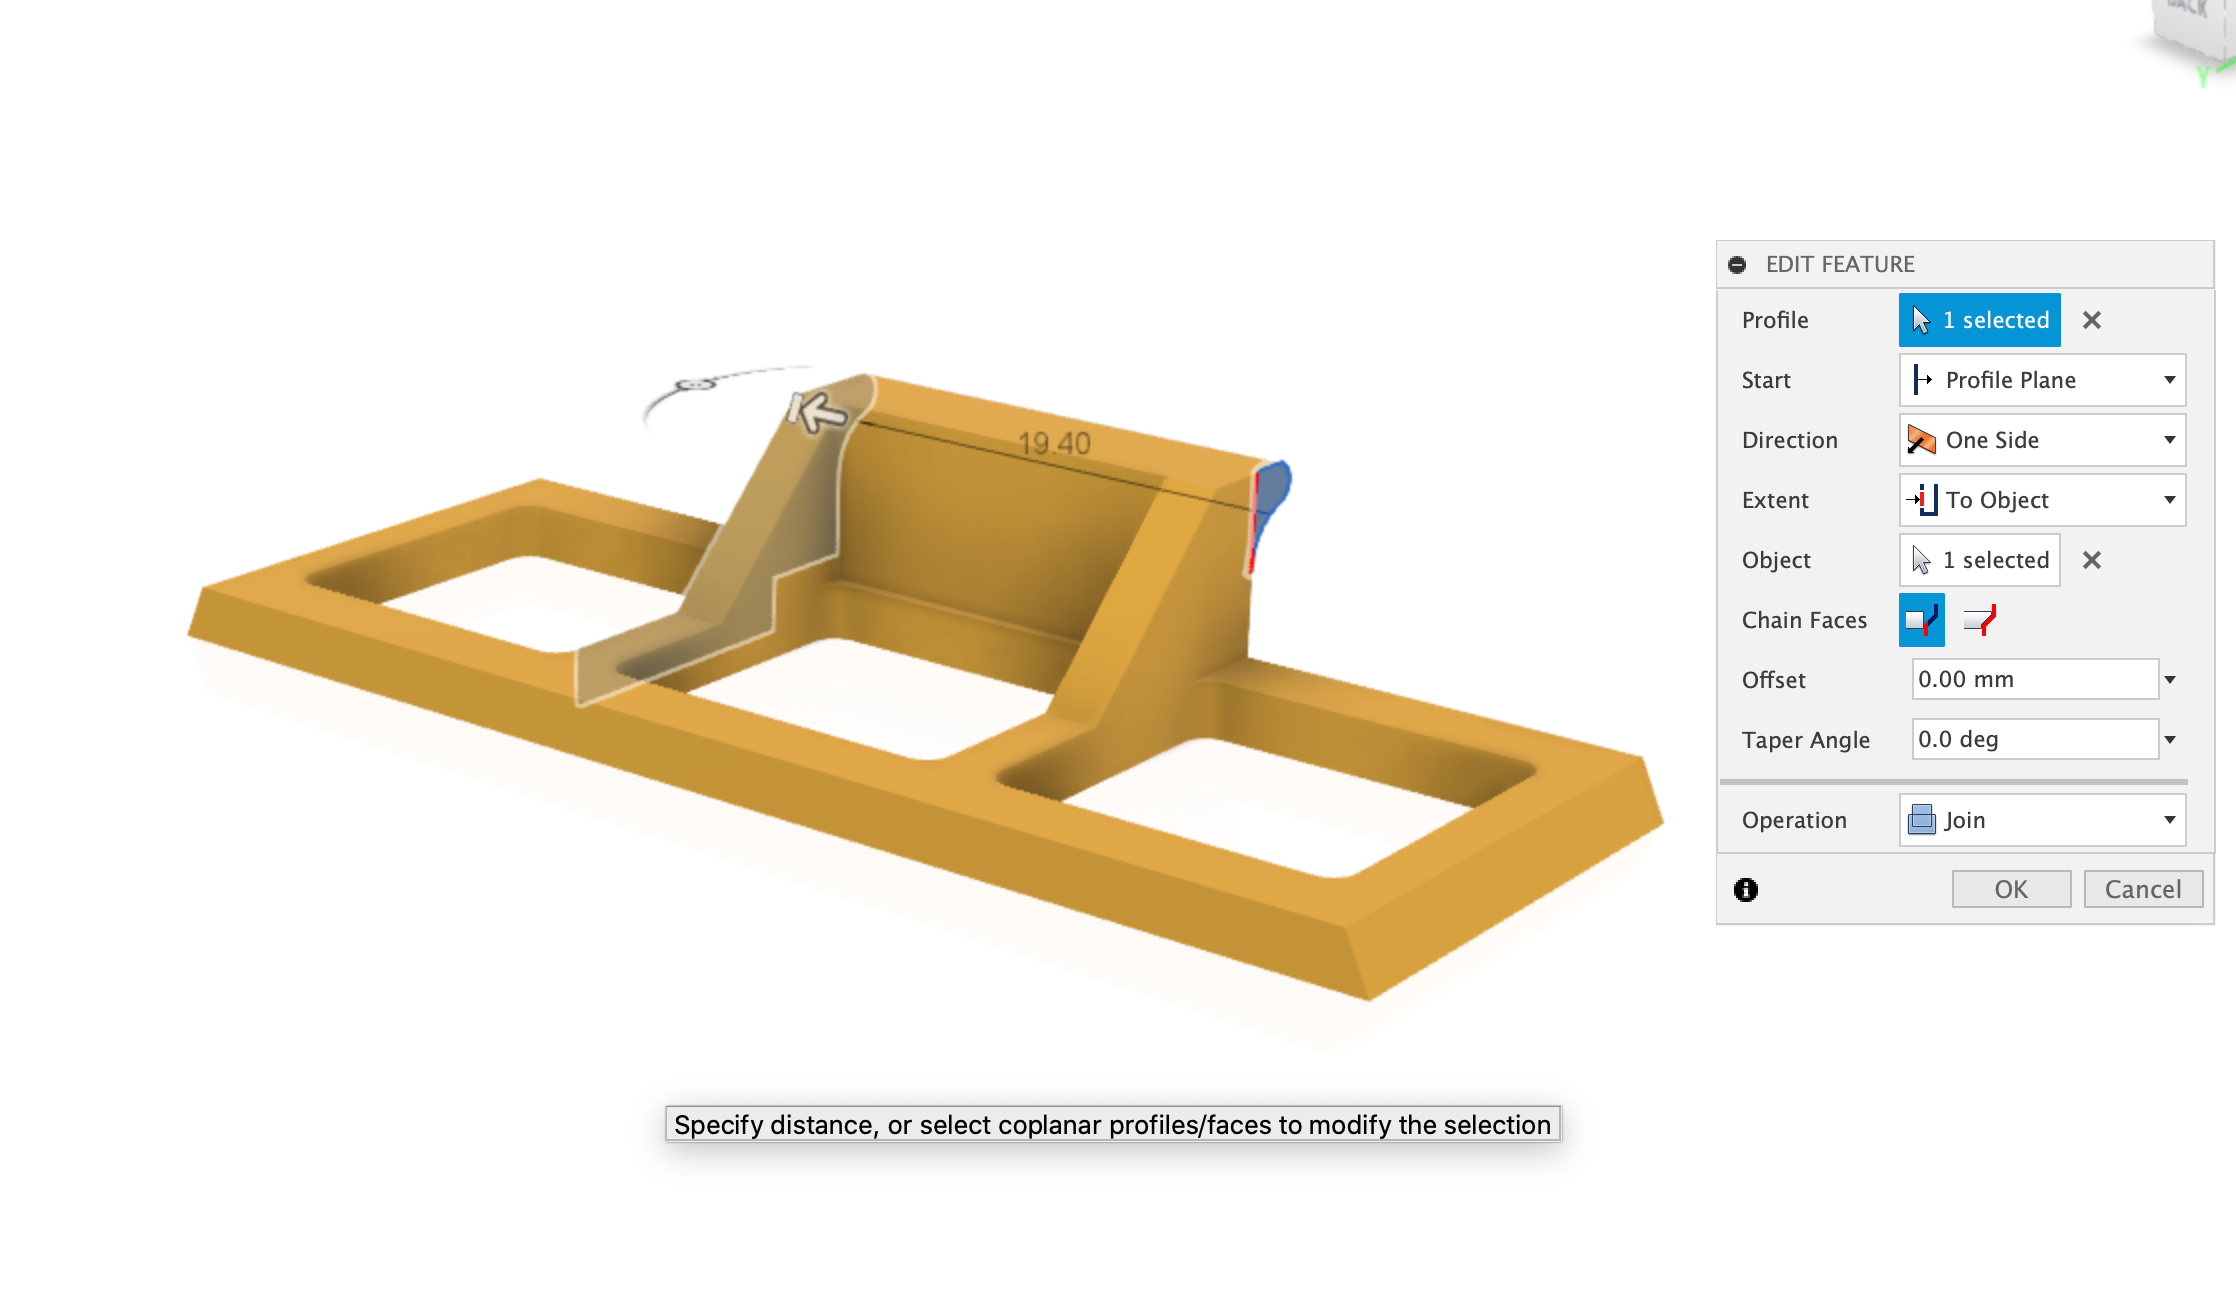
Extrude Battery Holder Profile
The battery holder profile now needs to be extruded
Front Chamfer Profile
Extrude Front Chamfer Profile
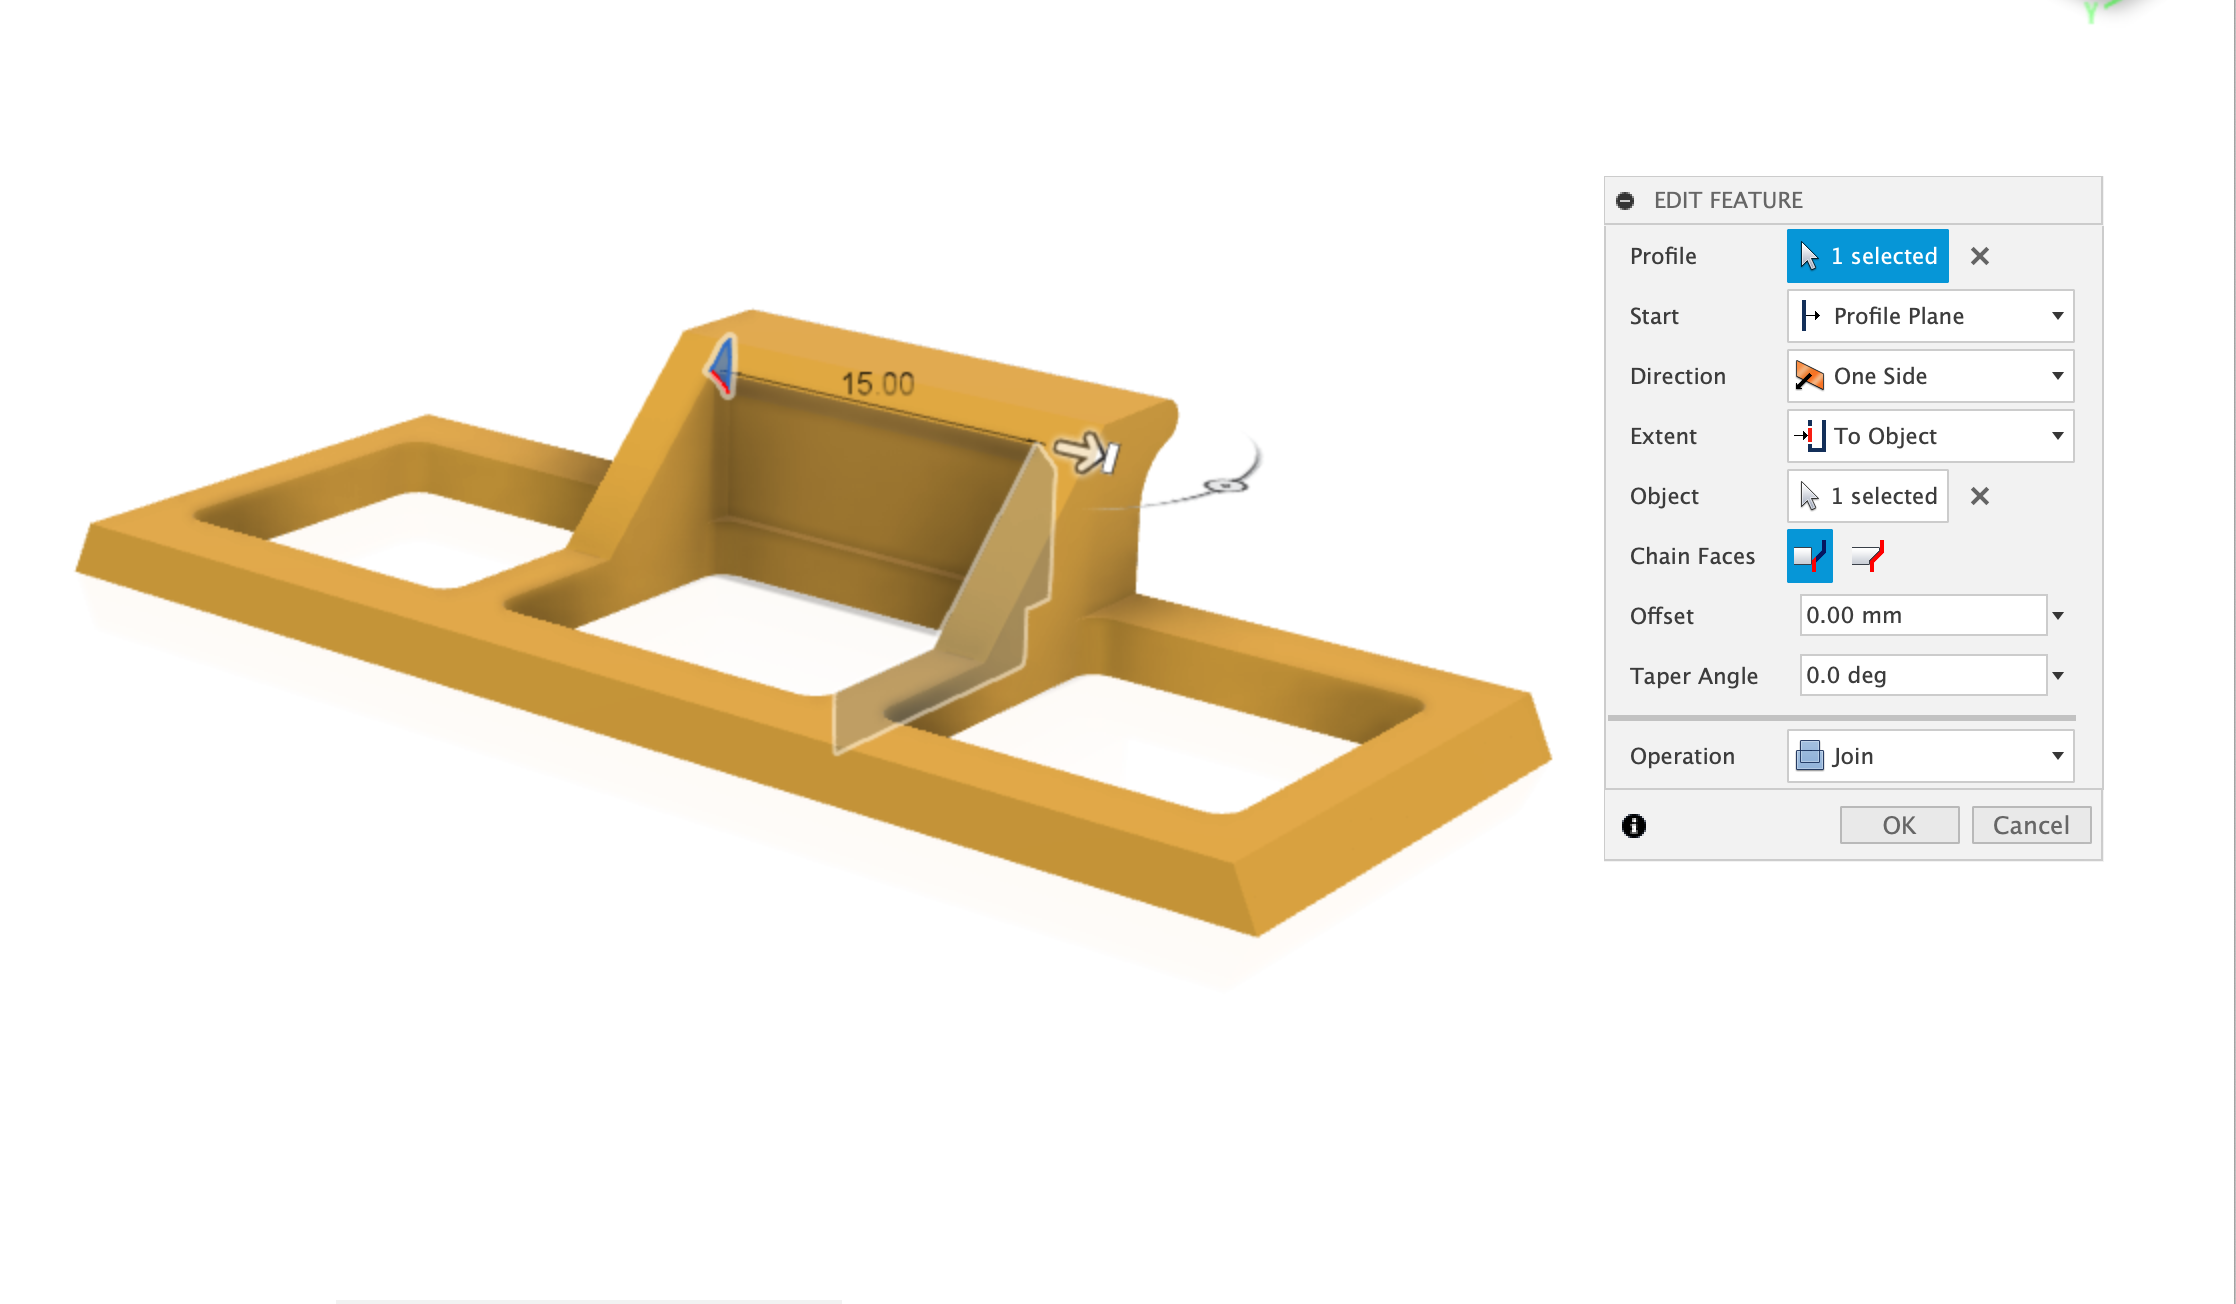
Fillet
Some optional fillets can be applied (see the illustration below). These can give extra strength to the part and make it more astheically pleasing.
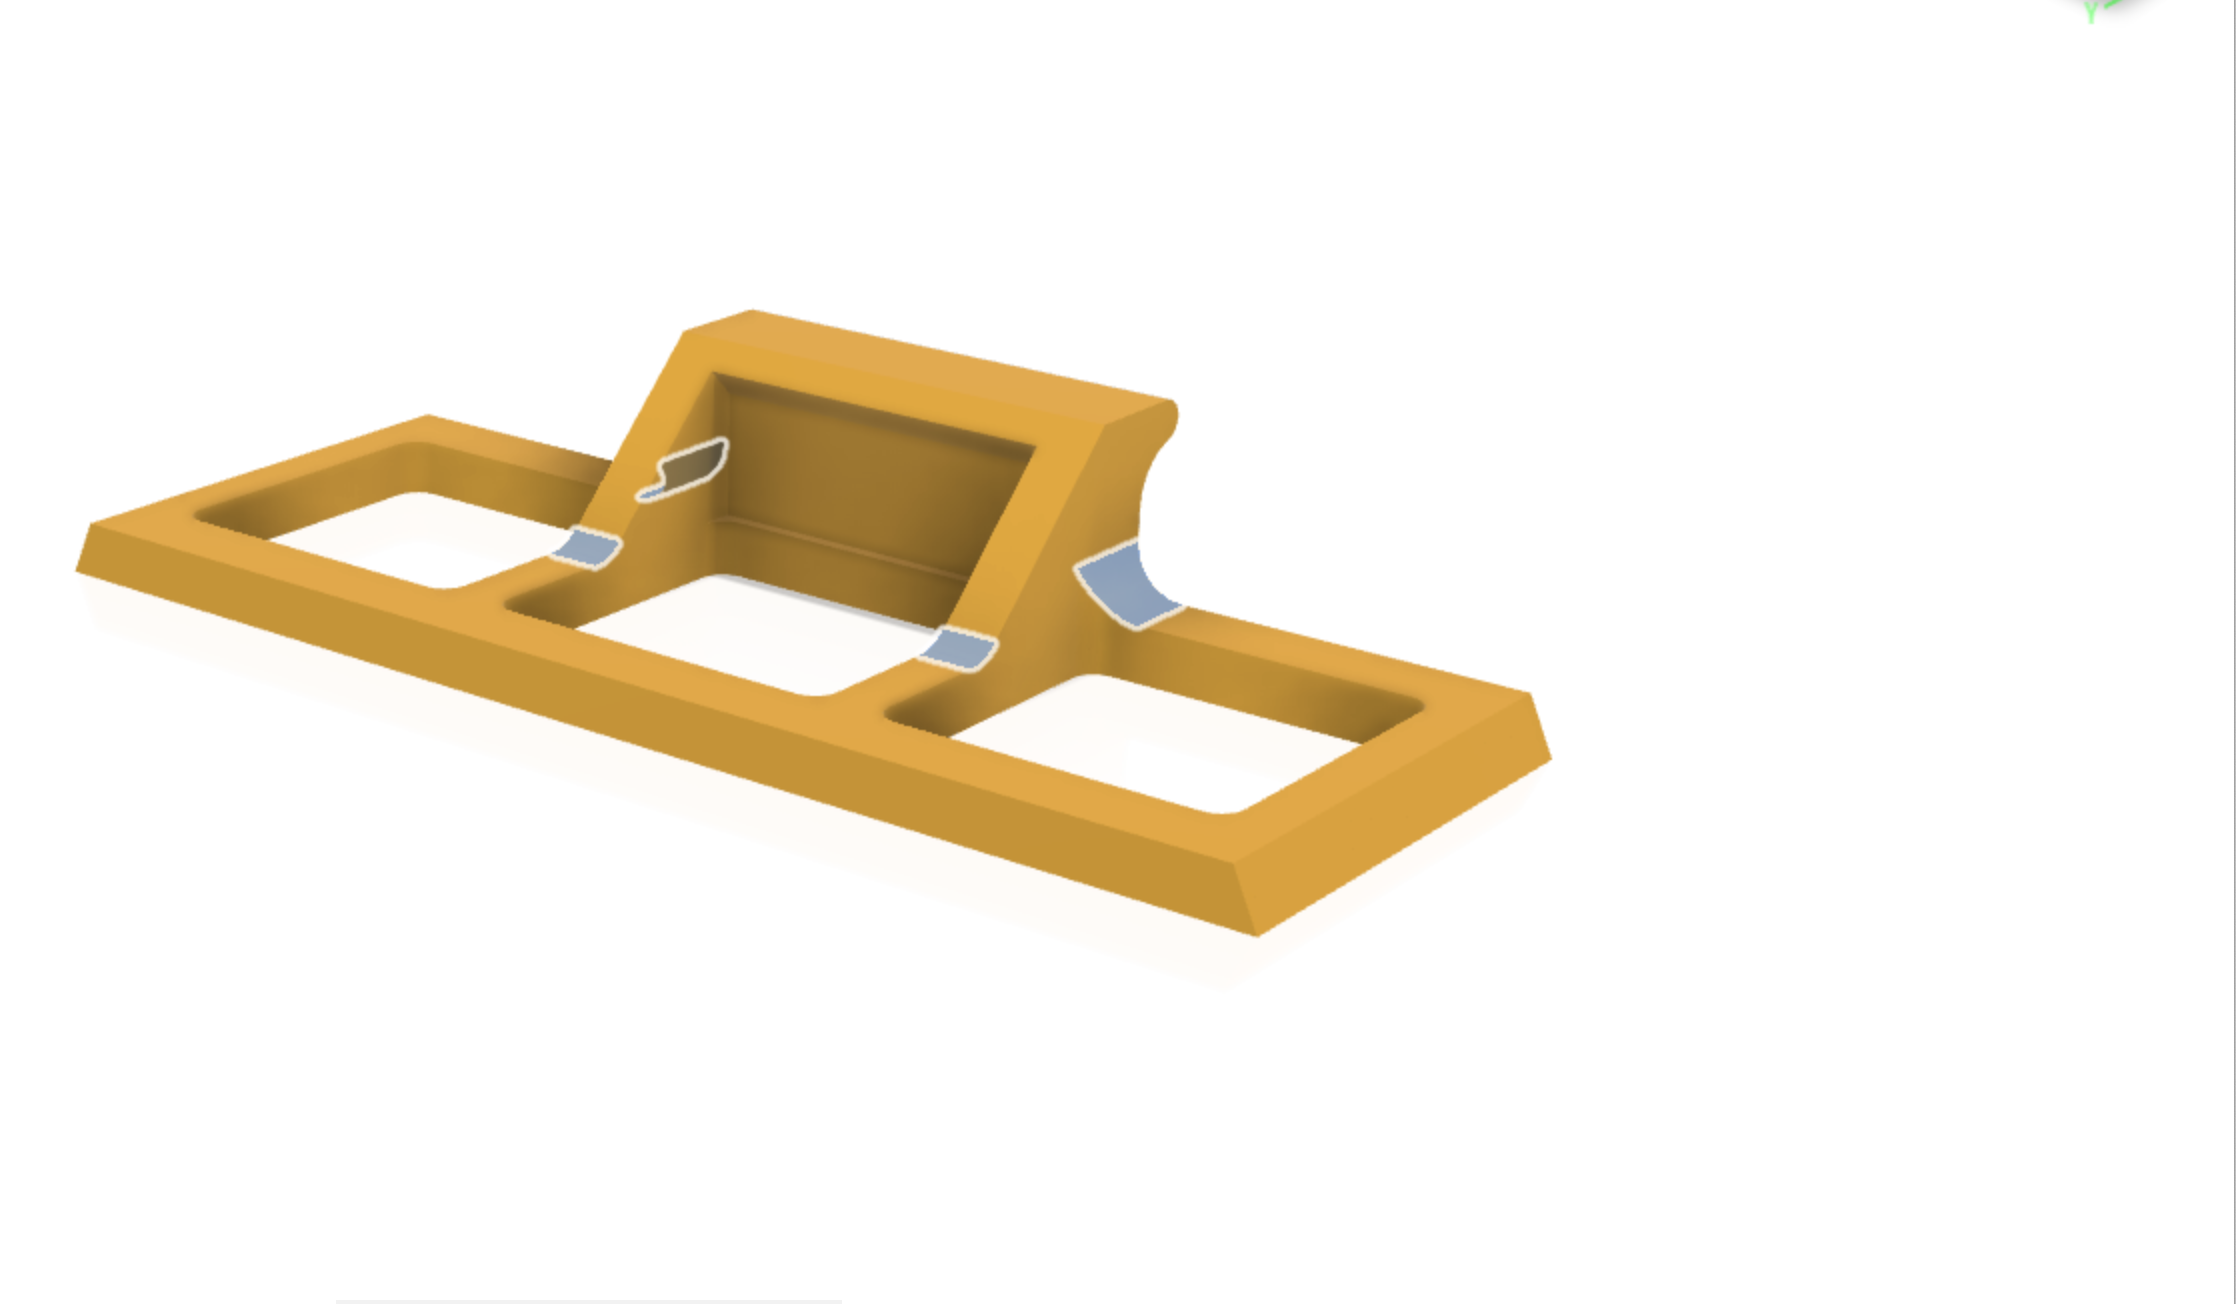
Motor Holder Complete
And you’re done. Next, right-click on the Body and save as an STL file, then print out the part.